Github, Windows and TortoiseGit - Part 1 Installing Pulling
This is a guide for all the Windows users (not me) out there. It will explain how to work with a github repository under windows using TortoiseGit.
Let’s get started. At this point you should be a collaborator or owner of a github repository. Download TortoiseGit. Install it like any other program. There are no special settings, just keep on clicking ‘next’.
Now download msysgit. During this installation you have to set some important settings. Please be sure that you set them correctly.
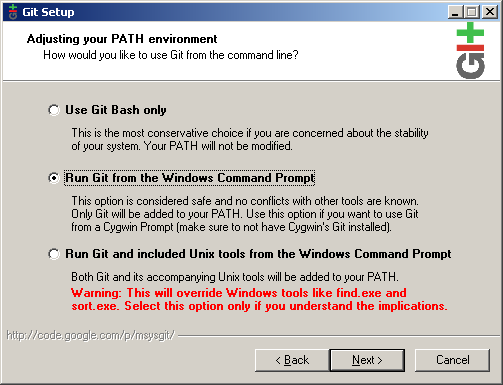
Adjust the PATH environment
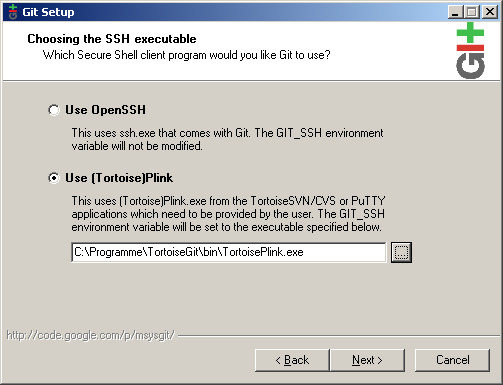
Choose the SSH executable

Choose line endings
After the successful installation of both programs continue with the
generation of private and public SSH-key. To do this you have to start
‘PuTTY Key Generator’ - find it in Start -Programs - TortoiseGit

Just click ‘Generate’ and move the mouse
After it’s done you see your freshly generated ssh public key. You can
define a passphrase at this step, but it isn’t required.
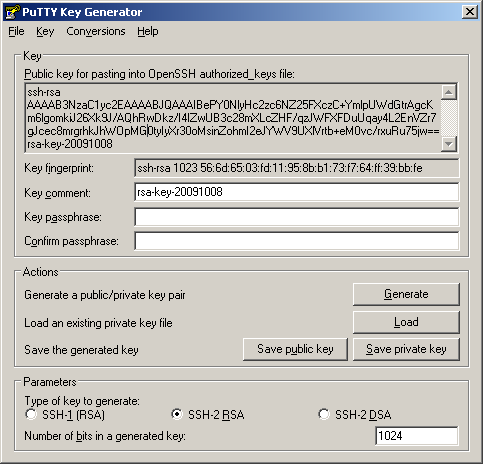
Save the public AND private key for later usage.
You can copy the key out of the box and add it to your github account.

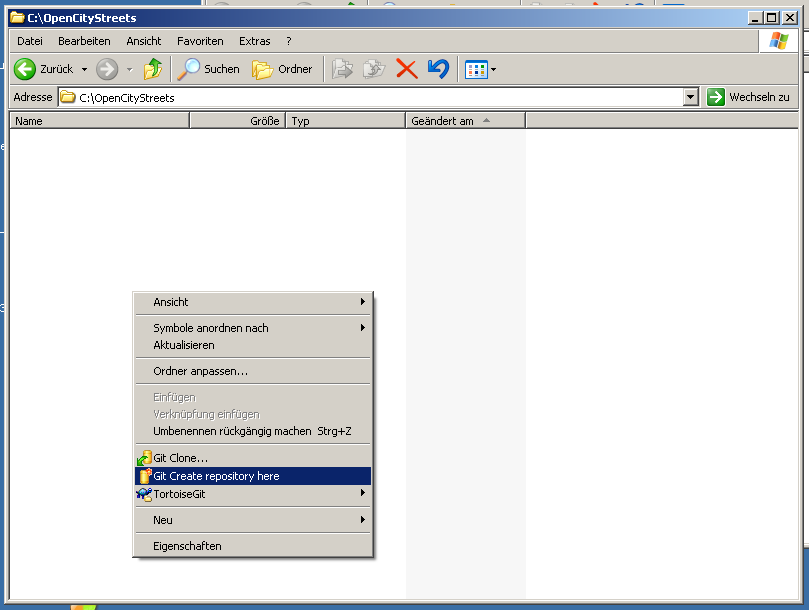
Now your ready to create a local repository. Create an empty folder
and right-click into it. | Choose ‘Git Create repository here’.

Now go to the repository settings…

… and set your full name and email that your using at github.

Here you click ‘Add New’ and paste the github ‘Your Clone URL’ into the
url field. Select the putty private key we created before, too.
Now we’re ready to pull for the first time. Select ‘Pull’ from the TortoiseGit menu.

For ‘remote’ select the ‘origin’ we added before. Be sure that ‘AutoLoad Putty Key’ is checked and for ‘Remote Branch’ master’ is selected (type it if you can select it).
Now click ok and we’re done. You should have all the repository files
now if you did everything correct.