Daniel Banck

CTO at weluse • Amateur Chef

Read this first

Deploying a React Native App with Fastlane - Part 2

Deploying to Android/Play Store

This is a part of a series of posts about deploying a React Native application with Fastlane.

  • Part 1 - Deploying to iOS/App Store
    • Part 1a - Auto-Increment build numbers
  • Part 2 - Deploying to Android/Google Play

Since the whole Fastlane and React Native ecosystem is constantly evolving, I’ll try to keep this post up to date to reflect the latest changes. Latest Update: 2016/03/30

Introduction

For Android we’ll need the following Fastlane tools:

  • supply - for syncing play store metadata and uploading the apk

And of course fastlane itself.

For building the apk we’ll use gradle.

Pre-Setup

You’ll need to create a new keystore (or use an existing one) like described in the React Native Android Docs.

Next setup your gradle variables and add signing to your app’s gradle config.

Now you need service account credentials for authenticating with...

Continue reading →


Deploying a React Native App with Fastlane - Part 1a

Auto-Increment build numbers

This is a part of a series of posts about deploying a React Native application with Fastlane.

  • Part 1 - Deploying to iOS/App Store
    • Part 1a - Auto-Increment build numbers
  • Part 2 - Deploying to Android/Google Play

Since the whole Fastlane and React Native ecosystem is constantly evolving, I’ll try to keep this post up to date to reflect the latest changes. Last Update: 2016/03/30

Introduction

We’ll use the setup from part 1. If you haven’t read it yet or haven’t set up a Fastlane project, please do so now.

Using the approach above still leaves you incrementing the build or version number manually in Xcode each time you want to deploy your application. This can be done by Fastlane, too.

Setup

Fastlane comes with a lot of actions. We’ll need increment_build_number and if you want commit_version_bump for this guide.

increment_build_number will...

Continue reading →


Deploying a React Native App with Fastlane - Part 1

Deploying to iOS/App Store

This is a part of a series of posts about deploying a React Native application with Fastlane.

  • Part 1 - Deploying to iOS/App Store
    • Part 1a - Auto-Increment build numbers
  • Part 2 - Deploying to Android/Google Play

Since the whole Fastlane and React Native ecosystem is constantly evolving, I’ll try to keep this post up to date to reflect the latest changes. Latest Update: 2016/03/30

Introduction

Our setup for iOS will look like this:

  • One central Apple ID shared across the whole team, used to manage our certificates, provisioning profiles and upload the application to iTunes Connect.
  • One git repository containing our encrypted certificates and provisioning profiles
  • A single command to do all the heavy lifting and publish our application to TestFlight

For all of this we’ll use the following Fastlane tools:

  • match - for creating and syncing our...

Continue reading →


Using a zonefile to find all servers using a wildcard SSL certificate

I recently had to renew a wildcard SSL certificate. The certificate is being used on a couple of servers and I was too lazy to look through all of my Ansible repositories to find out where.

A friend had the idea to use the zone file for that domain. I pulled the zonefile, stripped it down to the subdomains (removing all other record information), de-duplicated and sorted it.

Now I got a long list of subdomains/strings. A simple loop connects to all domains using openssl and prints an error or the certificate dates.

for i in (cat zonefile)
    echo $i
    echo \
    | openssl s_client -connect $i.<DOMAIN>:443 2> /dev/null \
    | openssl x509 -noout -dates
end

So I knew which server is using the wildcard certificate and which was about to expire.

Maybe I should start working on a central SSL termination…

Continue reading →


FreeNas Server #3: Der Zusammenbau

Dies ist eine Serie von Beiträgen über den Bau eines eigenen FreeNAS Servers.

  • Teil 1: Die Einzelteile
  • Teil 2: Auspacken
  • Teil 3: Zusammenbau

Die Gehäuselüfter

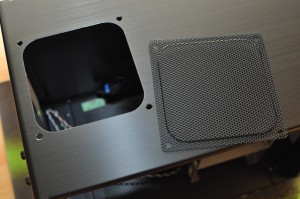
Beginnen wir den Zusammenbau mit dem Austausch der Gehäuselüfter. Der alte Gehäuselüfter lässt sich durch Lösen der vier Schrauben einfach aus der Gehäusedecke entfernen. An dessen Stelle wird der 120mm Lüfter von be quiet! gesetzt; das Gitter behalten wir natürlich bei.

Beim Einsetzen muss man sich bei den Abstandshaltern entscheiden, ob man den Lüfter direkt oder mit etwas Abstand an die Gehäusedecke setzen will. Ich habe mich für den geringen Abstand entschieden, sodass das “S” auf den Abstandshaltern nach oben zeigt.

Der Lüfter wird mit vier Plastikstiften, inkl. kleinem Gummiring befestigt.


Der 140mm Lüfter an der Front lässt sich durch geschicktes ziehen in eine Richtung aus der Fasssung...

Continue reading →


FreeNas Server #2: Das Auspacken

Here is an english version of this article.

Dies ist eine Serie von Beiträgen über den Bau eines eigenen FreeNAS Servers.

  • Teil 1: Die Einzelteile
  • Teil 2: Auspacken
  • Teil 3: Zusammenbau

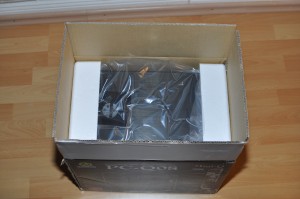
Nachdem nun alle bestellen Teile eingetroffen sind, geht es ans Auspacken und Sichten der Teile. Insgesamt waren es drei Pakete mit insgesamt um die 10 kg Gewicht.

Übersicht


Das Gehäuse

Auffallend ist, dass das Gehäuse beim Herausnehmen aus der Verpackung sehr leicht ist. Es sieht gut verarbeitet aus und hat keine scharfen Kanten. Lediglich das Abschrauben der Seitenwand stellt sich komplizierter als sonst heraus, da diese seitlich mit sechs kleinen Schrauben befestigt ist.


Das Netzteil

Das Netzteil wird mit einem Kaltgerätekabel, sowie diversen Kabelbindern geliefert. In seiner Ausgangsform hat es nur drei SATA-Stromanschlüsse, daher brauchen wir die extra Adapter.


...

Continue reading →


FreeNas Storage Appliance #2: Unboxing

Die deutsche Version dieses Artikels findest du hier.

This is a series of posts about building your own custom FreeNAS storage applicance.

  • Part 1: The components
  • Part 2: Unboxing

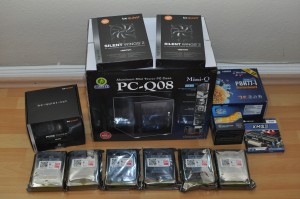
After delivery of all ordered parts, we’re going to have a closer look at them. It were 3 packets in total with a weight of about 10 kg.

Overview


Chassis

The chassis is very light and well processed. There are not sharp borders. Just unscrewing the side wall was a little complicated, since it’s mounted with six little screws.


Power supply

The power supply is shipped with a standard power cord and various cable straps. Since it has only three sata power connectors we’ll be needing additional adapters.


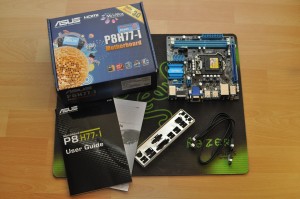
Motherboard

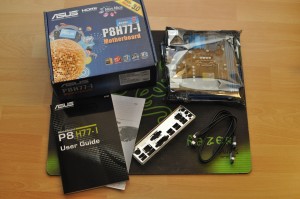
The motherboad ships with a chassis plate and two sata-cables. Thats why we need the six bent sata cables.


Processor & Memory

Not much to say here.

...

Continue reading →


FreeNas Storage Appliance #1: The components

Die deutsche Version dieses Artikels findest du hier.

This is a series of posts about building your own custom FreeNAS storage applicance.

  • Part 1: The components
  • Part 2: Unboxing

On my search for a reliable storage solution, I’ve came accross FreeNAS. Now this great looking software is missing a not too expensive hardware to run on.

After some days of research and discussions on the FreeNAS Forum, I’ve decided on the following hardware.

The components

Chassis Lian Li PC-Q08B Mini-ITX Tower-Cube - black Motherboard ASUS P8H77-I, Socket 1155, ITX Processor Intel Core i3-2120T Box, LGA1155 Memory 16GB-Kit Corsair XMS3 PC3-10667U CL9-9-9-24 Power Supply be quiet! Pure Power 300 Watt / BQT L7 Chassis fan be quiet! Silentwings 2 120x120 Chassis fan be quiet! Silentwings 2 140x140 Network Intel EXPI9301CTBLK PRO1000 CT PCIex bulk Hard Drive(s) 6x WD Red ...

Continue reading →


FreeNas Server #1: Die Einzelteile

Here is an english version of this article.

Dies ist eine Serie von Beiträgen über den Bau eines eigenen FreeNAS Servers.

  • Teil 1: Die Einzelteile
  • Teil 2: Auspacken
  • Teil 3: Zusammenbau

Auf der Suche nach einer ordentlichen Storage Lösung bin ich auf FreeNAS gestoßen. Die Software sieht sehr vielversprechend aus, nur fehlte mir eine relativ günstige Hardware als Basis.

Meine Anforderungen an das FreeNAS System sind unter anderem eine kompakte Bauweise, geringer Stromverbrauch, Verschlüsselung und Sicherheit gegen Datenverlust. Die erste beiden Punkte lassen sich durch die richtige Auswahl der Hardware lösen, die letzten beiden Punkte muss die Software bieten; zu dieser kommen wir später.

Nach etlichen Tagen Recherche und einiger Diskussion im FreeNAS Forum, habe ich mich für folgende Hardware entschieden.

Die Einzelteile

Gehäuse Lian Li PC-Q08B Mini-ITX ...

Continue reading →


Chef tutorial #1: Setting up a chef server

This tutorial is part of a series of posts about server management with
chef. If you don’t know chef, chef is an open-source systems integration
framework built specifically for automating the cloud.

There are two methods of using chef. Chef can run using a client/server
model, or on a consolidated configuration named chef-solo. This
tutorial will be about setting up chef using a client/server model. I
won’t cover the chef-solo part.

The guys at opscode are providing a hosted
chef server installation for a lot of bucks per month. If you’ve got the
cash, you can go and use their service, but you could also setup your
own chef server for free. You’ll just need a server (or a vps).

Installing chef server

Running chef server on Ubuntu is pretty easy.

You’ll need to use opscodes apt repositories with these Ubuntu versions.
You can add the required repository with this command:

echo "deb
...

Continue reading →